Stained glass has illuminated spaces with its vibrant colors and intricate designs for centuries. The melding of art and craftsmanship in stained glass creation has a rich history, providing timeless elegance to various structures. This age-old craft involves meticulous processes and a blend of traditional techniques with modern innovations. Here’s a glimpse into the captivating world of stained glass making.
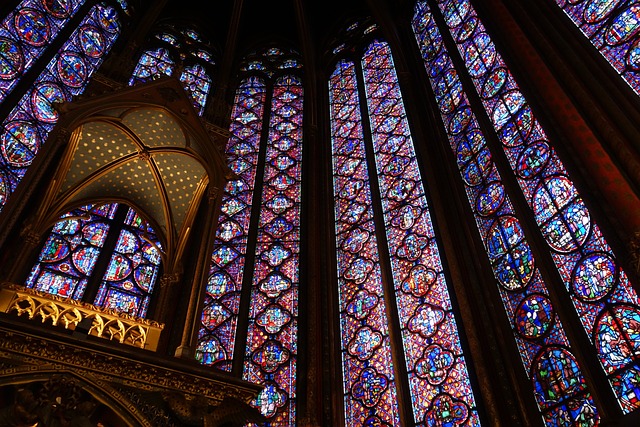
Image from Pixabay
Table of Contents
A Fusion of Color and Light
Stained glass, a fusion of color and light, has a storied heritage. For millennia, it has brightened architectural spaces, emanating a blend of functionality and aesthetic allure. Originating in ancient times, this form of decorative art has graced everything from the grand windows of Gothic cathedrals to the subtle accents in contemporary buildings.
The creation of stained glass represents a blend of artistic flair and meticulous craftsmanship. Throughout history, artisans have handed down their techniques, crafting panels that tell stories and capture viewers’ attention. The meticulous process begins with the design, often a detailed drawing that maps out the exact placement of each colored glass piece.
Craftspeople then select and cut colored glass to match the design specifications. The cut pieces are joined using strips of lead, a technique known as “leading,” to form the final design. The lead not only outlines the artwork but also adds structural support. Each glass shard’s edges are wrapped in copper foil, helping the pieces solder together seamlessly, an innovation attributed to Louis Comfort Tiffany in the late 19th century.
Innovations over time have allowed enhancements in texture, color, and strength. Modern methods, such as adding metallic salts during the glassmaking process, have expanded the range of colors and light diffusion. Meanwhile, technological advancements have added precision to cutting and assembly, ensuring greater detail and complexity.
The essence of stained glass art lies in its duality – it is both a barrier and a medium, obscuring while simultaneously telling a narrative. The images depicted in the glass have diverse inspirations, from religious iconography to abstract art.
In today’s world, stained glass continues to evolve, with artists employing new methods and materials to express ancient themes in modern contexts, thus keeping the timeless tradition alive. Its allure lies in its dynamic nature; the same piece can appear remarkably different, influenced by changing light and seasons.
Thus, stained glass remains a testament to human creativity and craftsmanship, a craft that not only stands the test of time but also keeps adapting, illuminating spaces in ever-new and enchanting ways.
Materials and Preparation
Stained glass artisans begin with the most crucial element: the glass itself. Glass comes in multiple colors, achieved by adding metallic salts during its manufacture. Selecting the right hue is a pivotal first step.
After choosing the appropriate glass, artisans create a design template, known as a cartoon. This detailed drawing serves as the blueprint for the final piece. With the cartoon complete, craftsmen use it to trace patterns onto the glass, which are then meticulously cut using a glass cutter.
Cutting and Shaping
Precision is paramount during the cutting phase. Artisans score the glass along the lines of the template and employ a variety of tools, such as grozers and running pliers, to break the glass along these scores cleanly. Grinding the edges smooth is crucial to fit each piece precisely within the design.
The process of “Cutting and Shaping” is a fundamental aspect of working with glass in artistic and practical applications.
Cutting: The goal during the cutting stage is to achieve the highest degree of accuracy. This step begins with scoring the glass, which involves using a sharp tool to mark or notch the surface of the glass where it needs to be cut. This marking follows the patterning set out by a predefined template, which guides the artisan in creating the desired shape.
After scoring, the glass must be separated along these scored lines. To accomplish this, craftsmen use specialized tools:
- Grozers: These are pliers with serrated jaws. Artisans use them to nibble away at the glass edges, allowing for greater control and precision, particularly when making smaller adjustments.
- Running pliers: These pliers are uniquely designed to put pressure on the score line, causing the glass to break along it. They have a curved jaw, which when applied to the score line and squeezed, helps to run the score through the glass, thus separating it into two pieces.
- Shaping: Following the cutting, the glass edges are usually sharp and may not fit together perfectly. This leads to the next crucial step: grinding.
- Grinding: This process is used to smooth the edges of the cut glass pieces to ensure they can be fit together neatly and securely. The equipment normally used is a glass grinder, which consists of a spinning diamond-coated head to effectively sand down or smooth out the rough edges. This not only removes any sharpness but also allows for minute adjustments so that the glass pieces fit within the overall design with high precision.
By executing these steps with care and meticulous attention to detail, the glass pieces will come together in a way that not only looks seamless but is also structurally sound, which is vital when creating durable glass art or components.
Assembly: Copper Foil and Lead Came Techniques
Stained glass pieces are traditionally joined using one of two methods: the copper foil or the lead came technique. The copper foil technique, popularized by Louis Comfort Tiffany in the 20th century, involves wrapping the edges of each piece of glass with a sticky copper tape and soldering them together. This method is favored for intricate designs and allows for more detailed work.
Lead came, on the other hand, uses pre-formed lead H-shaped channels to hold the glass in place. The glass pieces are fitted into the channels, and the joints where the cames intersect are soldered to secure the entire assembly.
The assembly of stained glass artworks involves two main techniques: copper foil and lead came. Both techniques serve to join separate pieces of glass to form a unified artistic piece, but each has distinct processes and ideal uses.
- Copper Foil Technique: Pioneered by Louis Comfort Tiffany, the copper foil method became prominent in the 1900s. It starts with cutting and shaping individual glass pieces to fit the desired pattern. Once cut, the edges of each glass fragment are encased in copper tape – a thin strip with adhesive on one side. This tape is pressed firmly along the edges and then the adjoining foiled edges of adjacent pieces are soldered together using a special soldering iron and lead-tin solder. This method’s fine solder lines allow for elaborate, delicate patterns, often seen in Tiffany lamps and intricate window designs. Its flexibility and strength make it ideal for three-dimensional works and complex patterns that require a high level of detail and precision.
- Lead Came Technique:
In the lead came technique, sections of lead H-shaped channels, or cames, are used to hold glass pieces. Each strip of came has a grooved channel in which the glass edges are inserted. These cames are shaped to fit the design’s layout, with the glass snugly nestled in the grooves. After all the glass pieces are placed within the cames, the joints where cames intersect are soldered. This process results in a sturdy, somewhat less detailed, grid-like structure, beneficial for larger panels or windows where broad lines are part of the design aesthetic and added strength is necessary.
While copper foil offers flexibility and is favored for complex and detailed artworks, lead came provides robustness, thus is more suitable for larger installations. Both require skill and have their own aesthetic appeal, contributing to the diverse beauty found in stained glass works around the world.
Soldering and Waterproofing
With all the pieces encased in copper foil or lead came, the soldering process begins. Artisans apply flux to the joints— a chemical agent that facilitates the bonding of solder to the copper or lead. Then, using a soldering iron and solder, they meticulously work over every joint to ensure a solid bond, adding strength and rigidity to the final piece.
Afterward, the panel is waterproofed. For copper-foiled projects, this involves coating the solder lines with a patina to achieve a uniform color and applying a waterproofing compound. In lead came creations, the gaps in the cames are filled with a special putty called glazing compound, further sealing and strengthening the glasswork.
Soldering and Waterproofing Simplified: Soldering is like glueing metal parts together, but it involves melting a filler metal to create the bond. When constructing something like a stained glass window, pieces of glass are held in shape by strips of copper foil or frames of lead, known as “came.”
Here’s what happens:
- Preparation: Each connection point between the metal and glass gets cleaned and coated with flux. Flux is a substance that helps the melted solder metal stick to the copper or lead.
- Soldering: An artisan takes a hot soldering iron, which is a tool that heats up to melt a metal alloy called “solder.” This melted solder is applied over the fluxed areas, cooling down to form a strong connection between all the pieces of metal and glass.
- Strengthening: This process doesn’t just join the pieces, it also adds firmness to the entire creation, making it sturdy.
Once the soldering is done, it’s time to make the item watertight.
For copper-foiled items:
- The solder lines get a patina treatment, which is a kind of color finish that gives a uniform appearance.
- A specific waterproofing agent is applied to prevent water from seeping through.
For lead came items:
- A glazing compound, which acts like a filler, is pressed into the spaces between the leads. This not only stops water from getting in but also adds even more solidity to the glass artwork.
In both methods, the aim is to make sure that the finished glasswork doesn’t let water through, preserving its beauty and integrity.
Installation and Preservation
Once assembled, the stained glass panel is cleaned and polished, often with a soft cloth and cleaning solution, to remove any residue or fingerprints. It is then framed with durable materials, such as steel or zinc, for structure support.
In historical restorations, preserving original craftsmanship is essential. Specialists painstakingly clean and repair these windows, matching the textures and colors of the ancient glass to maintain the authenticity of the artwork.
After the intricate assembly of stained glass, the panel undergoes final beautification and preparation for display.
Installation:
- Cleaning: After construction, the stained glass requires careful cleaning. Specialists use a soft cloth and a non-abrasive cleaning solution to wipe away solder or flux residues and fingerprints.
- Polishing: Following cleaning, the glass is polished until it gleams, optimizing the translucence and vibrancy of the colors when light passes through.
- Framing: The panel is then secured within a frame—often made from steel or zinc. This frame isn’t just decorative; it reinforces the structure, especially for larger panels that need extra support to ensure their stability and safety once installed.
Preservation:
- Historical Significance: With historical stained glass, every effort is made to preserve the original piece’s integrity. These windows are cultural treasures, often telling stories of the era and craftsmanship they come from.
- Restoration Techniques: Conservators use specialized methods to clean the glass without damaging the delicate antique surfaces. They might use weaker or more neutral solutions, soft brushes, and meticulous handling to prevent further erosion or scratching.
- Repairing Damage: When pieces are broken or lead came is weakened, restoration specialists work to repair them. This requires sourcing materials that match the original in texture, color, and type of glass to seamlessly integrate repairs without detracting from the panel’s aesthetic and historical value.
- Maintaining Authenticity: Specialists might employ several strategies to replicate the old glass’s unique characteristics. For example, touching up faded paintwork on the glass with custom-mixed colors or using traditional tools and techniques to mimic the style of the period in which the window was originally made.
The overarching goal in preservation is to keep the window as close to its original form as possible, ensuring it can continue to be appreciated by future generations, keeping its historical narrative alive.
Conclusion
The process of making stained glass is a beautiful blend of precision and creativity. Despite the technological advancements in cutting and assembling glass, the essence of stained glass crafting remains deeply rooted in its traditional methods. Each piece not only conveys visual splendor but also reflects a story of its maker’s skill and the era it represents.
Today, stained glass remains a revered art form, gracing the windows of modern homes, cathedrals, and historical buildings alike. Whether you behold a delicate Tiffany lamp or a monumental church window, the brilliant allure of stained glass stands as a testament to the time-honored techniques that continue to inspire and awe.
Video : How Stained Glass is made?
FAQs for "The Artisan's Guide to Creating Stained Glass Masterpieces"
To begin making stained glass, you’ll need several key materials and tools, including colored glass, a glass cutter, copper foil or lead came, solder, a soldering iron, flux, a flux brush, and patina. Optional tools may include a glass grinder, grozing pliers, and safety equipment such as gloves and eye protection.
The choice of glass depends on the desired visual effect for your piece. Consider the color, texture, and transparency you want in your finished work. Opt for opalescent glass for less light transmission or cathedrals and clear textured glass for more light and color diffusion.
Copper foil involves wrapping the edges of each piece of glass with adhesive copper tape and then soldering them together, which is ideal for intricate designs. Lead came uses preformed lead channels that fit around the glass pieces, best suited for larger panels due to its structural strength.
Properly scoring and fitting the glass pieces, using the correct width of lead or copper foil, and applying a consistent bead of solder are critical. Additionally, you should reinforce larger panels with a strong frame or rebar for extra stability.
Yes, always wear safety glasses to protect your eyes from flying shards and gloves to minimize the risk of cuts. Learn proper scoring and breaking techniques, using tools correctly, and always ensure your work area is clean and well-organized to reduce accidents.
Soldering involves heating the copper foil-wrapped glass edges with a soldering iron and then applying solder to bond the pieces together. Preparation is important, and applying flux to the foil before soldering helps the solder to adhere and spread evenly.
You can add color to the solder lines by applying patina, a chemical solution that reacts with the solder, and can either darken it to a copper or black finish or give it a different hue, depending on the type of patina used.
Common mistakes include not cutting the glass precisely, leading to a poor fit, applying too much or too little solder, and not reinforcing large panels properly. Also, neglecting to clean and polish your piece can diminish its overall aesthetic.
Gently remove dirt and residue using a soft, lint-free cloth and a mixture of mild detergent and water. Avoid abrasive materials or cleaners that can scratch the glass or damage the lead or foil.
Stained glass is best displayed in a location where it can catch natural light, such as in front of a window. Ensure that the panel is properly supported and securely installed to prevent any damage or accidents.

