Mushrooms, those intriguing and versatile fungi, have captivated the culinary world with their unique flavors and textures. Unlike any other ingredient, mushrooms offer a realm of tastes and uses that span from the comfort of a hearty mushroom pizza to the refined elegance of a mushroom risotto, and even to the aromatic delight of an oyster mushroom sautée.
 Pin
Pin Image Credit: vwalakte from Freepik.com
Beyond their culinary allure, mushrooms are fascinating organisms that emerge from spores, not seeds, distinguishing themselves markedly from the plants in your garden or the vegetables in your fridge. This introduction guides you through the delightful and multifaceted world of mushrooms, demonstrating their significance in both the kitchen and the garden.
Within the diverse kingdom of mushrooms, the edible varieties find their way into an array of dishes, with certain species lending themselves more favorably to specific culinary creations. Depending on the mushroom at hand, chefs and home cooks alike may utilize different parts of this fleshy fungus. While in some dishes, the focus might be solely on the succulent caps, in others, like tempeh, a traditional Indonesian product, the mycelium – an intricate network of filament-like structures – plays a crucial role, acting as a binding agent and giving the food its unique texture and flavor.
Venturing beyond the culinary landscape, this guide also explores the fascinating process of growing mushrooms. Unlike cultivating traditional vegetables, raising mushrooms presents a unique set of challenges and rewards, as these organisms belong to the kingdom of fungi. Whether you’re aspiring to nurture them in your backyard or within the confines of your home, mushrooms demand specific conditions to thrive, including the correct substrate (or growing medium) and temperature. Fortunately, even beginners can start, transitioning from mere mushroom spawn to bountiful harvests in just a few weeks.
Table of Contents
Understanding Mushroom Growth Essentials
Understanding Mushroom Growth Essentials it involves understand the environmental conditions and lifecycle phases that are pivotal for successful mushroom cultivation. This foundational knowledge is indispensable for anyone looking to grow mushrooms, whether for personal consumption or commercial purposes.
 Pin
Pin Image Credit: wirestock from Freepik.com
Growth Conditions
Mushrooms are not plants; they belong to the fungi kingdom, which explains their unique growth requirements. Unlike plants, mushrooms don’t need sunlight to grow but rather depend on moist, humid environments with indirect or no light.
Here’s a breakdown of the essential conditions:
- Humidity and Moisture: Mushrooms require high humidity levels, typically around 80-90%. This moisture in the air is vital for the mushroom spores to develop into mycelium and eventually into fruiting bodies. A lower humidity level can cause the mushrooms to dry out, stopping their growth or producing poor-quality fruiting bodies.
- Temperature: The optimal temperature for mushroom growth varies among species. However, most mushrooms grow well within a temperature range of 55°F (13°C) to 70°F (21°C). Keeping the growing area within this temperature range is crucial for stimulating mycelium growth and ensuring the development of healthy mushrooms.
- Indirect Light: While mushrooms do not require light for photosynthesis like plants, they do need a small amount of indirect light to determine the direction in which to grow. This light shouldn’t be too bright or direct as it can raise the temperature and lower humidity, negatively affecting growth.
- Substrate: The growth medium, or substrate, is where mushrooms will draw their nutrients from. Each mushroom species has its preferred substrates. Common substrates include straw, wood chips, grain, and compost. The substrate needs to be properly pasteurized or sterilized to eliminate any competing bacteria or mold.
The Lifecycle of Mushrooms
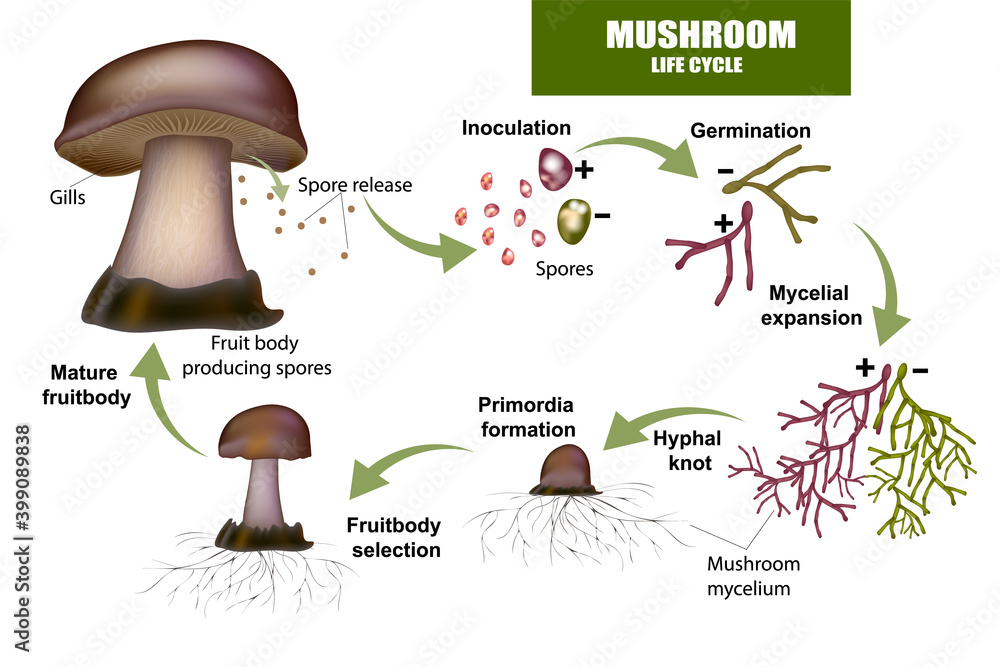
Understanding the mushroom life cycle is essential for successful cultivation. The life cycle comprises several stages:
 Pin
Pin Image Credit: AdobeStock
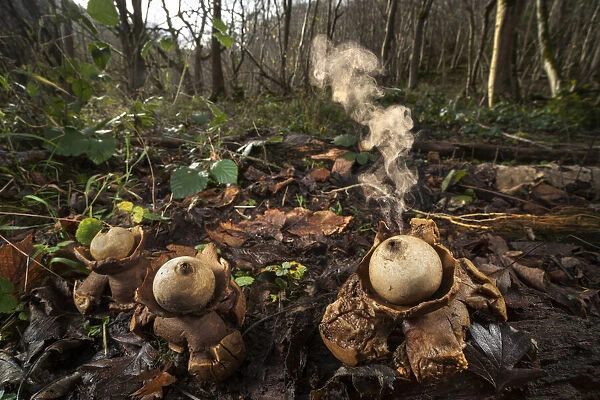
Spore: Every mushroom’s life begins as a spore, which can be thought of as the seeds of the fungi world. Spores require specific conditions to germinate; humidity and temperature are critical factors.
 Pin
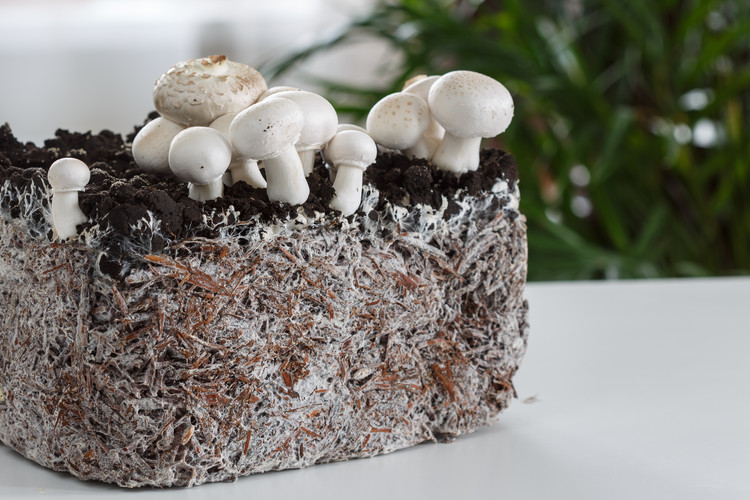
Pin Mycelium: Once the spore germinates, it forms mycelium, a white, fuzzy substance that constitutes the vegetative part of the fungus. Mycelium spreads through the substrate, decomposing and absorbing nutrients.
 Pin
Pin Image Credit: ArchDaily
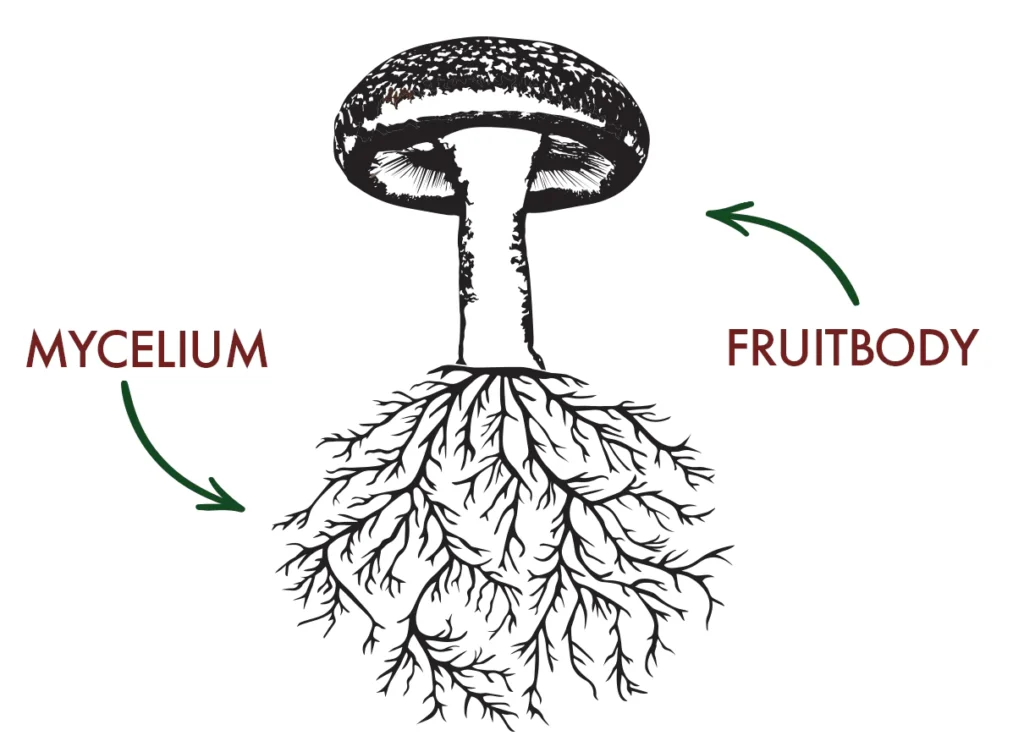
Fruiting Bodies: The part of the mushroom that we typically consume is the fruiting body. This part emerges from the mycelium when conditions are right – usually when there is a sudden change in environment, like a drop in temperature or a change in humidity. The fruiting body produces spores, completing the cycle.
 Pin
Pin Image Credit: HostDefense
Grasping these essentials of mushroom growth – the required growth conditions and the lifecycle phases from spore to mature mushroom – equips you with the knowledge to begin exploring mushroom cultivation. Whether your interest lies in growing common edible mushrooms like oysters and shiitakes or you’re venturing into more exotic varieties, this understanding is your first step towards a fruitful harvest.
Starting Simple: Grow Kits
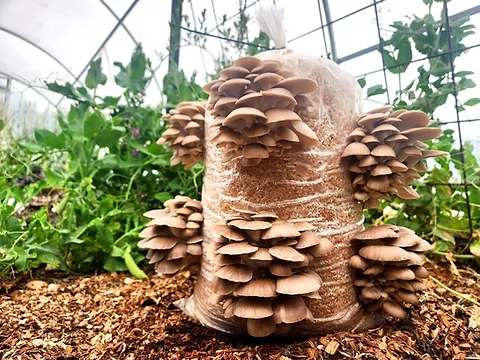
Starting your mushroom cultivation journey can be a fascinating and rewarding experience, especially with the use of mushroom grow kits. These kits are designed to simplify the process, making it accessible even to those without any prior mycological knowledge. Here’s a more detailed look into why grow kits are an ideal starting point and how you can successfully grow your mushrooms at home using them.
 Pin
Pin Image Credit: SporeShift
What’s in a Mushroom Grow Kit?
Mushroom grow kits contain pre-sterilized substrates (growth mediums) that have been inoculated with mushroom spawn. The substrate, which can vary depending on the mushroom species, is often a composition of grains, straw, sawdust, or compost, providing the essential nutrients for mushroom development. The kit also includes detailed instructions tailored to the specific mushroom variety you choose to grow, ensuring you have all the guidance you need for the process.
Popular Varieties for Beginners
While there are countless mushroom species, certain types are more suited to beginners due to their resilience and relatively quick growing cycles. Oyster mushrooms are particularly popular for their adaptability and rapid growth. Shiitake mushrooms offer a slightly more challenging experience with their unique flavor as a reward. Button mushrooms, familiar to many, can also be a good starting variety, providing a classic mushroom growing experience with a commonly loved result.
Step-by-Step Guide
- Soaking the Kit: Most mushroom grow kits require an initial soaking or “shocking” process. This step is crucial to jumpstart the germination of spores by mimicking the natural conditions that tell the mushrooms it’s time to grow. Instructions will guide you on how long to soak the kit.
- Setting Up Your Environment: After soaking, the kit needs to be placed in an environment conducive to mushroom growth. This often means a spot with indirect sunlight, away from direct heat sources, and at a temperature specified by the instructions. Each mushroom variety has its preferred climate, but generally, a cool, moist area works well.
- Maintaining Moisture Levels: Key to successful mushroom cultivation is maintaining proper moisture levels. This usually involves gently misting the kit with water daily to keep the substrate from drying out, mimicking the damp conditions mushrooms love.
- Harvesting Your Mushrooms: After maintaining the right conditions, mushrooms will begin to form and grow quite rapidly. Most kits are ready for harvesting within a few weeks. It’s important to follow the guidelines on when and how to harvest to ensure you don’t disturb the growth of new mushrooms.
When to Expect Results
Depending on the mushroom type, some can start showing growth within a week, while others might take a bit longer to colonize the substrate fully. Oyster mushrooms, for instance, are known for their quick turnaround, with harvests sometimes possible in as little as two weeks after starting the kit.
Mushroom grow kits offer a simplified, low-risk avenue to delve into the world of mushroom cultivation. They not only provide a practical understanding of the basics but also yield the immediate satisfaction of growing and tasting your very own mushrooms. For enthusiasts looking to explore mycology further, successfully growing mushrooms from a kit can serve as a springboard into more complex cultivation methods or even experimenting with other, more exotic mushroom varieties.
DIY Method: Using Coffee Grounds
Growing mushrooms at home using spent coffee grounds is an eco-friendly and efficient method particularly suited for varieties like oyster mushrooms, which thrive in nutrient-rich substrates. This DIY approach not only recycles waste but also introduces you to mycology, the fascinating world of fungi cultivation.
Here’s a detailed guide to get you started:
Supplies Needed
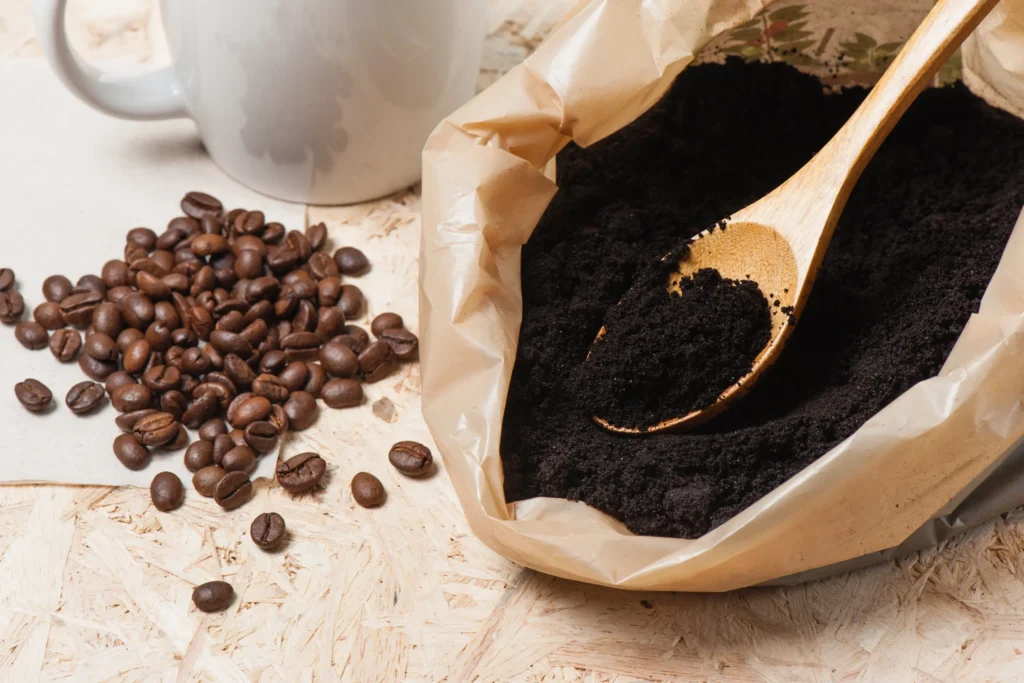
Spent Coffee Grounds: Collect grounds from your daily coffee; the fresher, the better to avoid unwanted mold growth.
 Pin
Pin Image Credit: New Atlas
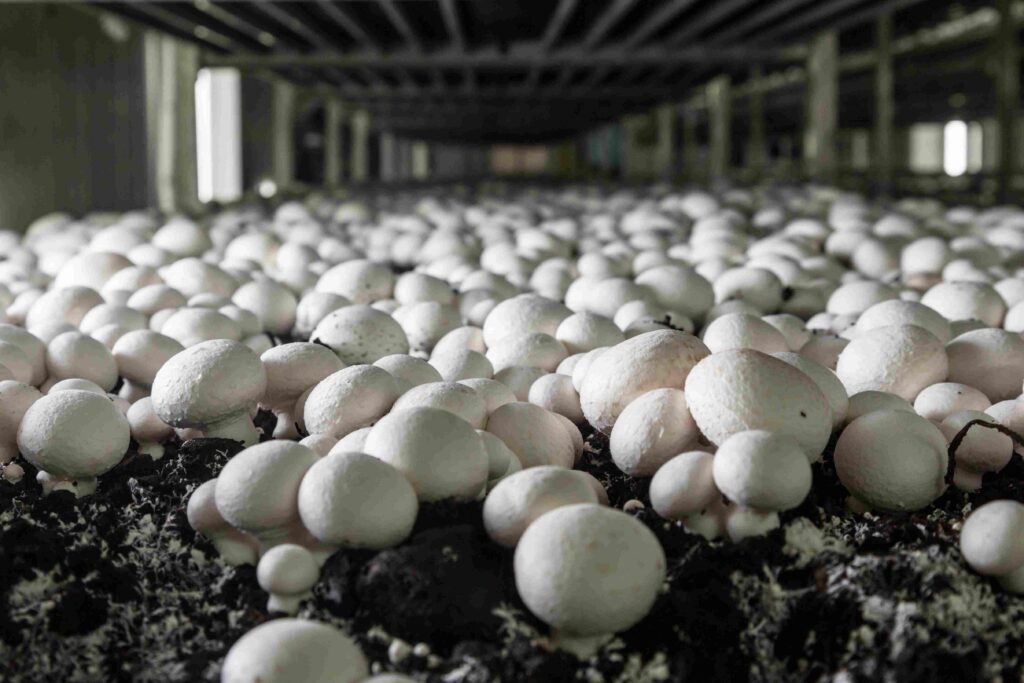
Mushroom Spawn: Oyster mushroom spawn works best for beginners due to its resilient nature and compatibility with coffee grounds.
 Pin
Pin Image Credit: Wikifarmer
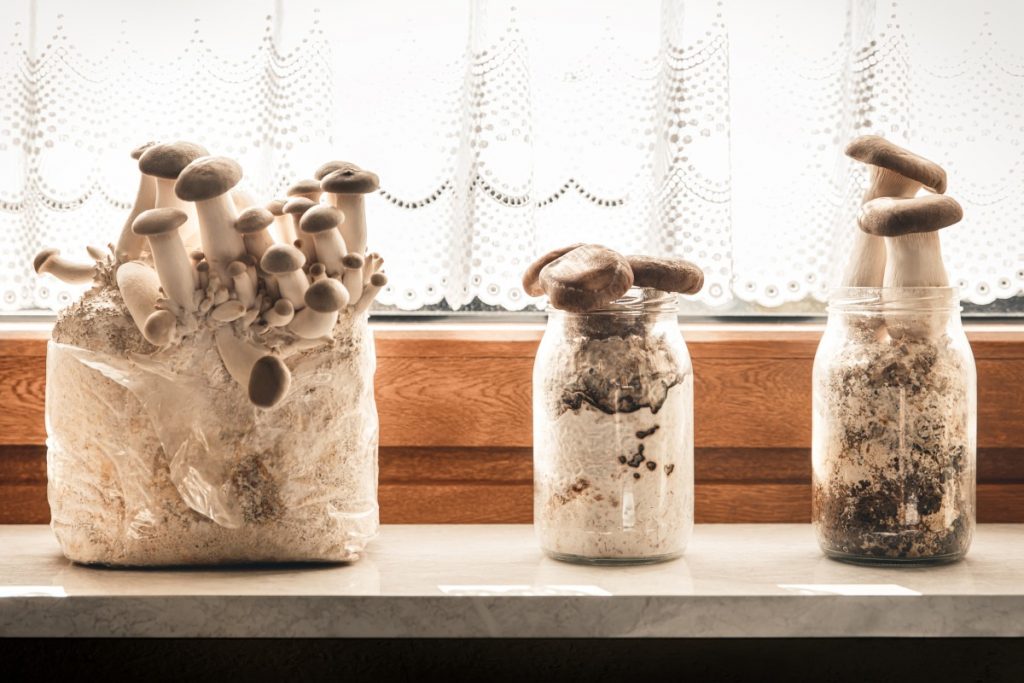
Plastic Bag or Clear Jar: These will serve as your makeshift mushroom growing containers. Ensure they’re clean to prevent contamination.
 Pin
Pin Image Credit: GroCycle
A Spray Bottle: For misting your mushrooms to maintain the necessary humidity.
 Pin
Pin Image Credit: rawpixel.com
A Fork or Stick: To mix the mushroom spawn with the coffee grounds.
 Pin
Pin Image Credit: KamranAydinov from Freepik.com
Step-by-Step Guide
- Preparation of the Substrate:
Begin with your spent coffee grounds. You should have enough to fill your chosen container about two-thirds full. The coffee grounds should be at room temperature to avoid harming the mushroom spawn. - Inoculation:
Mix your oyster mushroom spawn with the coffee grounds. Use a fork or a stick to ensure an even mixture. This step is crucial for the mycelium (the vegetative part of a fungus) to spread throughout the substrate, providing the necessary nutrients for mushroom growth. - Choosing Your Container:
Transfer your spawn-infused coffee grounds into your plastic bag or clear jar. If using a bag, poke small holes (about 2-3 inches apart) to allow for air exchange. For jars, loosely place the lid on top without screwing it tight to let air in. - Ideal Growing Conditions:
Place your container in an area with indirect light and maintain a consistent temperature, ideally between 18°C to 24°C (64°F to 75°F). Direct sunlight should be avoided as it can dry out the substrate and halt mushroom growth. - Humidity:
Mushrooms require a humid environment to grow. Mist the inside of your container lightly with water daily to maintain high humidity. However, be cautious not to overwater, as standing water can lead to bacterial growth and ruin your mushroom crop. - Observation and Harvesting:
In about 3 to 4 weeks, you should start seeing the first signs of mushroom growth. These are called “pinheads,” and they’ll soon develop into full-sized mushrooms. Harvest them before the edges of the caps start to turn upwards. Use a sharp knife to cut the mushrooms at their base to avoid disturbing the mycelium, which can produce more mushrooms in subsequent flushes.
Tips for Success
- Sterility is key. Make sure your workspace, tools, and hands are clean to minimize contamination risks.
- Experiment with different mushroom species once you’re comfortable with the process. Each type may have unique growing requirements.
- After harvesting, the coffee ground substrate can still be utilized as compost for your garden, promoting a cycle of sustainability.
This DIY method of growing mushrooms with coffee grounds not only offers a practical introduction to mushroom cultivation but also contributes to reducing waste, embodying a full-circle ecological practice.
Wood Chips and Logs: For the Outdoor Enthusiast
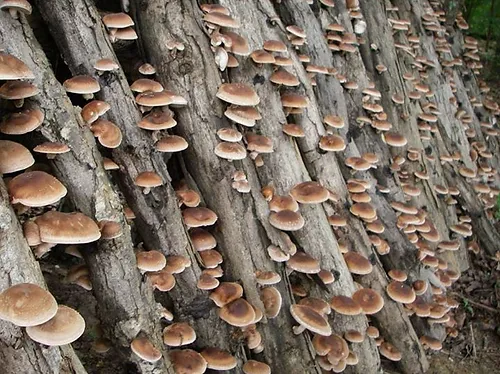
The cultivation of mushrooms on wood logs represents a fascinating intersection between ancient fungal farming techniques and modern-day enthusiasm for sustainable agriculture. True to tradition, this method is especially well-suited for cultivating varieties such as shiitake (Lentinula edodes) and oyster mushrooms (Pleurotus spp.), leveraging the natural symbiosis between fungi and wooded environments.
Here’s a detailed exploration of this outdoor cultivation method.
 Pin
Pin Image Credit: MycoLogical
- Choosing the Right Logs: The first step involves selecting the appropriate logs for cultivation. Hardwood species, such as oak, maple, or beech, are preferred due to their dense structure and compatibility with the mycelium of shiitake and oyster mushrooms. The logs should be freshly cut, ideally during late winter or early spring before the sap starts running, as this is when the wood contains the most nutrients. The ideal log size is generally about 3 to 8 inches in diameter and around 3 to 4 feet in length, making them manageable in size and easier to handle during the inoculation process.
2. Preparing the Spawn: Mushroom spawn plugs are small wooden dowels that have been inoculated with mushroom mycelium. These plugs serve as the “seeds” for your mushroom crop. The mycelium on these plugs will gradually colonize the host log, eventually producing fruiting bodies (mushrooms). Spawn plugs can be purchased from a variety of online suppliers or local mushroom farms.
3. Inoculating the Logs: The inoculation process involves drilling holes into the logs at spaced intervals, typically about 6 inches apart along the length of the log and 2 to 3 inches apart in a circle around the circumference of the log. The depth of the holes should match the length of the spawn plugs. Once drilled, the spawn plugs are gently tapped into the holes using a hammer. It’s important to ensure the spawn is in direct contact with the wood to initiate the colonization process.
4. Sealing and Positioning: After inserting the spawn plugs, the holes are sealed with wax to protect the inoculated sites from contamination and to retain moisture within the wood. Beeswax or cheese wax can be melted and applied over the holes using a small paintbrush or a wax melter. Following this, the logs are positioned in a shaded, moist area of your garden, simulating the mushroom’s natural habitat. Ideal conditions involve dappled sunlight or about 80% shade, with high humidity to encourage mycelial growth. The logs can be stacked in a crisscross fashion or simply leaned against a support.
5. Patience and Harvest: This method is a testament to patience, as it can take anywhere from several months to a year for the first mushrooms to appear, depending on the mushroom species, the weather, and the wood type. During this waiting period, it’s crucial to maintain the logs’ moisture through regular waterings or by taking advantage of natural rainfall. Once the mycelium fully colonizes the log, mushrooms will begin to fruit. Under optimal conditions, a single log can produce mushrooms for several years, offering multiple harvests each year during the spring and fall.
Cultivating mushrooms on logs not only yields delicious results but also connects enthusiasts to the timeless rhythms of nature. This method provides an ecologically sustainable way to produce food and can be a fulfilling hobby or a component of a diversified homestead. Remember, each log you inoculate is a step towards fostering a more intimate relationship with the natural world.
Advanced Techniques: Creating a Mushroom Chamber
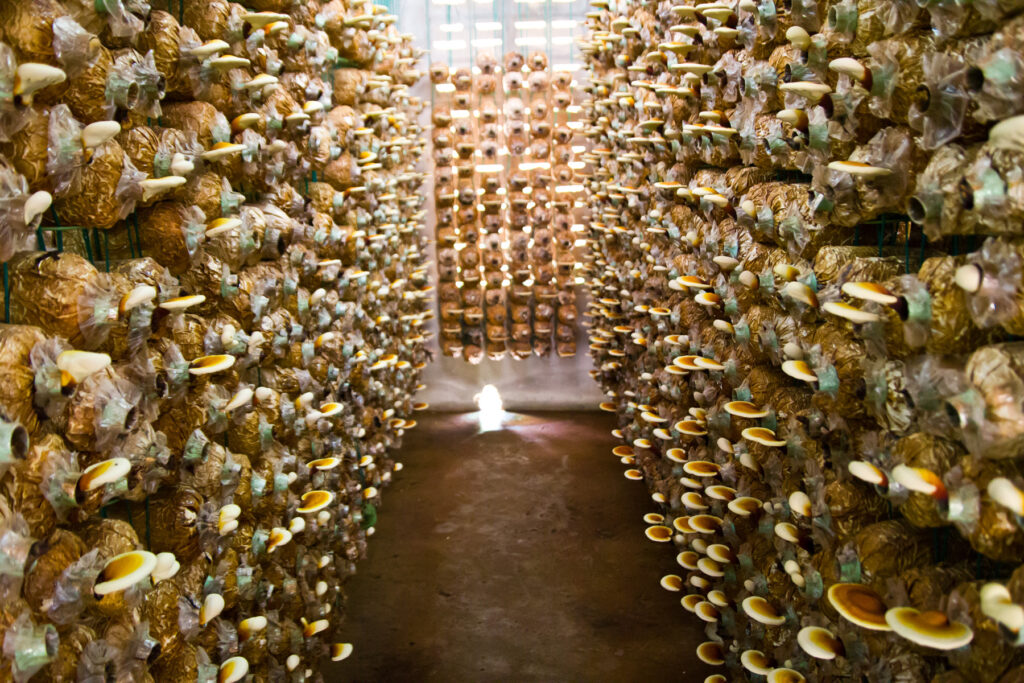
For passionate mushroom cultivators eager to dive deeper and maximize their harvests, creating a mushroom chamber or grow room represents an exciting challenge. This advanced technique isn’t just about providing a space for mushrooms to grow; it’s about meticulously controlling the environment to cater to the specific needs of various mushroom species, ensuring optimal growth conditions and maximizing yields. Let’s explore what it takes to set up and maintain a mushroom chamber.
 Pin
Pin Image Credit: Mother Earth News
1. Understanding the Basic Needs of Mushrooms
Before diving into the construction of a mushroom chamber, it’s crucial to understand the fundamental requirements of mushrooms. These include temperature, humidity, light, and fresh air exchange. Each species of mushroom has its own preferred conditions, so identifying what you want to grow is the first step.
2. Choosing a Space
The size of your mushroom chamber can vary from a small closet to an entire room, depending on the scale of your cultivation ambitions. Basements, spare rooms, or even large cabinets can be converted into effective grow spaces. The key is choosing a space where you can control the environment.
3. Controlling Temperature
Mushrooms generally prefer cooler temperatures, ranging between 55-60°F (13-16°C) for most species. Installing a thermostat-controlled heater or air conditioner within the chamber allows for precise temperature control. Insulating the space helps maintain consistent temperatures.
4. Managing Humidity
Humidity is perhaps the most critical factor in mushroom cultivation, often needing to be as high as 90-95% for many species. A humidifier is essential in a mushroom chamber, and a hygrometer should be used to monitor the humidity levels constantly. Automatic humidifiers that can be set to maintain specific humidity levels are particularly useful.
5. Ensuring Proper Lighting
While mushrooms don’t require as much light as plants, they do need some light to guide their growth. Indirect natural light or a few hours of fluorescent or LED light per day is sufficient. The lighting shouldn’t raise the temperature within the chamber; thus, LEDs are often preferred for their cool operation.
6. Maintaining Air Circulation
Fresh air exchange is necessary to provide the carbon dioxide mushrooms produce during growth with fresh oxygen. This can be achieved with an air exchange system, which can be as simple as a fan with a filter to prevent contaminants. Some growers opt for a passive air exchange system that utilizes vent holes.
7. Monitoring and Cleaning
A successful mushroom chamber requires regular monitoring to ensure the environment remains within the optimal parameters for your fungi. Regular cleaning and sterilization of the chamber are also crucial to prevent the growth of mold and bacteria, which can outcompete or contaminate your mushroom crop.
Creating a mushroom chamber is an advanced cultivation technique that offers enthusiasts the ability to grow a diverse array of mushroom species under controlled conditions. While the initial setup requires a significant investment in time and resources, the rewards of higher yields and the ability to grow exotic species make it a worthwhile venture for the dedicated cultivator. Remember, research and preparation are key—understand the specific needs of the mushrooms you wish to grow and carefully plan your chamber to meet those requirements.
Conclusion
Growing mushrooms at home, whether through simple kits, sustainable methods like using coffee grounds, traditional techniques with wood, or advanced cultivation in controlled environments, provides a rewarding experience and a delicious bounty. Each method has its own set of requirements and benefits, allowing you to explore the fascinating world of mycology right from your home. Armed with this guide and a sense of adventure, you’re well on your way to becoming a proficient mushroom cultivator.
FAQs: Growing Mushrooms at Home
Yes, absolutely! Many mushroom varieties, such as oyster mushrooms, are particularly well-suited for beginners. Start with a simple method, like using a mushroom growing kit, which contains everything you need to get started.
The materials depend on the method you choose. Basic needs often include mushroom spores or spawn, a substrate (such as coffee grounds, straw, or wood chips), and a humid environment. For more controlled cultivation, you might also need containers, bags, or a dedicated space like a mushroom chamber.
The time from inoculation (adding spores to the substrate) to harvest varies by mushroom species and cultivation method. Oyster mushrooms, for example, can be ready to harvest in as little as 3-5 weeks under optimal conditions.
Mushrooms do not rely on light for photosynthesis in the same way plants do, but light can still play a role in their development. Indirect light can help mushrooms grow in the right direction, but intense direct sunlight can dry out substrates and impede growth. A few hours of indirect light per day is usually sufficient.
Different mushrooms have different optimal temperature ranges. Many species prefer cooler temperatures between 55°F to 70°F (12°C to 21°C). Always check the specific temperature requirements for the mushroom species you’re growing.
Good hygiene and proper substrate preparation are crucial for preventing mold and contaminants. Sterilize or pasteurize your substrate before use, and always work in a clean environment. If growing indoors, maintaining proper ventilation can also help reduce the risk of unwanted molds.
Yes, mushrooms can be grown indoors at any time of the year, as long as you can provide the right conditions of temperature, humidity, and indirect light. Outdoor cultivation may be more seasonal, depending on your climate.
Oyster mushrooms are a popular choice for beginners due to their fast growth, relatively easy care, and tolerance for varying conditions. Shiitake mushrooms are also a good option, especially if grown on logs or pre-inoculated blocks.
The cost can vary widely depending on the method you choose and whether you start from a kit or source your own materials. Basic mushroom growing kits can be as affordable as $20-$30, but setting up a more extensive operation with a variety of mushrooms and a controlled environment could cost more.
While it’s possible to scale up your mushroom growing to a small business, starting with personal use in mind is wise. As you gain expertise and if you have enough space, you can potentially sell fresh mushrooms to local markets, restaurants, or through a CSA.

