These adorable stars are designed as a gift for younger kids. They are perfect travel companions, or make a little friend for cuddling in bed.
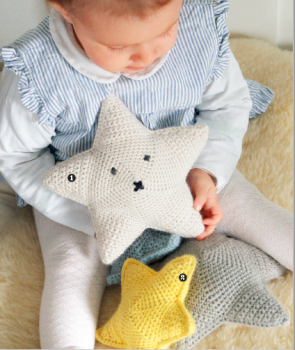
Large crochet star :
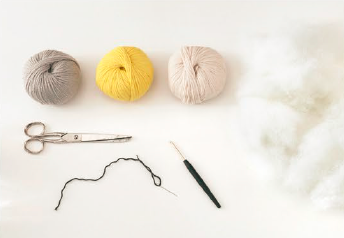
You will need:
- 4.5mm (UK 7: US 7) crochet hook
- About 100g (3½oz) wool in grey or white, here: Lamana Cusco (100% alpaca)
- Stitch marker
- Scissors
- Yarn needle
- About 30g (1oz) wadding material
- Embroidery needle (optional)
- Black wool scraps (optional)
Finished dimensions: about 24cm (9½in) in diameter
How to make Large crochet star?
Both stars are made in 2 sections using double crochet stitch. First you crochet from the centre out in a spiral (which creates a slightly bulging shape), then you crochet the points of the star back and forth in rows. Tips and tricks for crocheting can be found from here.
1st round: crochet a 5 stitch loop.
2nd round: double crochet into every stitch. (10 stitches)
3rd round: double crochet into every 2nd stitch. (15 stitches)
4th round: double crochet into every 3rd stitch. (20 stitches)
5th round: double crochet into every 4th stitch. (25 stitches)
6th round: double crochet into every 5th stitch. (30 stitches)
7th round: double crochet into every 6th stitch. (35 stitches)
8th round: double crochet into every 7th stitch. (40 stitches)
9th round: double crochet into every 8th stitch. (45 stitches)
10th round: double crochet into every 9th stitch. (50 stitches)
11th round: double crochet into every 10th stitch. (55 stitches)
12th round: double crochet into every 11th stitch. (60 stitches)
13th round: double crochet into every 12th stitch. (65 stitches)
14th round: double crochet into every 13th stitch. (70 stitches)
Now you crochet the 5 points of the star in rows as follows (as you have 70 stiches, there will be 14 stitches for each point of the star):
Step 1: For the 1st point of the star, double crochet 14 stitches (insert a stitch marker in the following stitch – this is where you will later start the 2nd point). Turn the work.
Step 2: Next row: no turning chain stitch, skip 1 stitch, double crochet to the end of the row. Continue in this manner, decreasing 1 stitch per row, and the point will form nice and evenly. Finally you are left with 1 stitch. Cut the thread and pull it through the loop.
Step 3: The 2nd point begins from the stitch marker. Remove the stitch marker, join in the yarn again here and crochet a chain stitch (this counts as the first stitch). Double crochet a further 13 stitches up to the end of the row, turn the work and crochet this point exactly as you did for the first. Work the remaining points in the same way.
Step 4: Crochet the second side of the star as above.
Step 5: Carefully sew up any loose threads on the wrong side (the interior) of both sections. Firmly pull the thread from the loop at the start and likewise sew in this end.
Step 6: Lay the 2 sections with wrong sides facing and double crochet the edges of the points together. At the upper end of the points, double crochet 3 times into 1 stitch.
Step 7: When only 2 edges are open, start stuffing in the wadding material: take small quantities of the wadding and use the handle of your crochet hook to push these into the points of each star. Continue filling to the centre making sure this is particularly well stuffed.
Step 8: For the 2 final edges you will have to alternate between crocheting the seam together and inserting more wadding. Cut the final thread and secure it well. Mould the star into shape. If you like, you can embroider a face with black wool.
“It is Christmas in the heart that puts Christmas in the air”
– William Turner Ellis
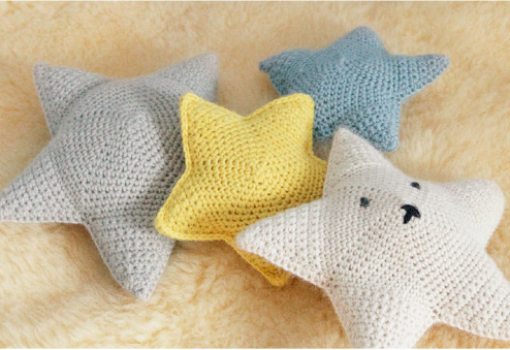
Small crochet star :
This smaller variant of the same star is an even cuter present for cuddling and playing.
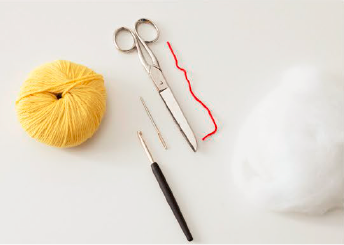
You will need:
- 4.5mm (UK 7: US 7) crochet hook
- About 50g (1¾oz) pale blue or yellow wool: here Lamana Cusco (100% alpaca)
- Stitch marker
- Scissors
- Yarn needle
- About 20g (¾oz) wadding material
Finished dimensions: about 18cm (7in) in diameter
To help count your spiral rounds, mark the first stitch of each new round with a stitch marker.
Cuddly Star is a delightful and easy-to-make gift for younger kids. This plush, cuddly star can be a comforting and fun toy for children to play with and hold onto at night. Making the Cuddly Star is a simple and enjoyable craft project that can be completed in just a few hours.
Another easy tutorial to make the Cuddly Star, you will need the following materials:
- Yellow fleece fabric
- Scissors
- Sewing machine or needle and thread
- Polyester stuffing
- Black felt or fabric marker
- Embroidery floss in various colors
Once you have gathered all the materials, follow these steps to create the Cuddly Star:
- 1. Begin by cutting out two star-shaped pieces from the yellow fleece fabric. You can either draw the star shape onto the fabric and cut it out, or use a star-shaped stencil to trace and cut the fabric.
- 2. Place the two star-shaped fabric pieces together, with the wrong sides facing out. Sew around the edge of the star, leaving a small opening along one of the points.
- 3. Once the star is sewn together, turn it inside out so that the right sides are facing out.
- 4. Use the small opening to fill the star with polyester stuffing, making sure to stuff it firmly so that it holds its shape.
- 5. Once the star is fully stuffed, sew the opening closed using a needle and thread or a sewing machine.
- 6. Next, cut out smaller star shapes from the black felt or use a fabric marker to create the eyes and mouth of the Cuddly Star. You can also use embroidery floss to add additional details, such as a smile or rosy cheeks.
- 7. Finally, your Cuddly Star is ready to give to a younger child as a thoughtful and delightful gift. It can be a comforting and fun toy for them to play with, cuddle, or carry around.
The Cuddly Star is a simple and enjoyable craft project that can bring joy to any young child. It is a handmade gift that can bring warmth and comfort to a child’s life, and is sure to be cherished for years to come.
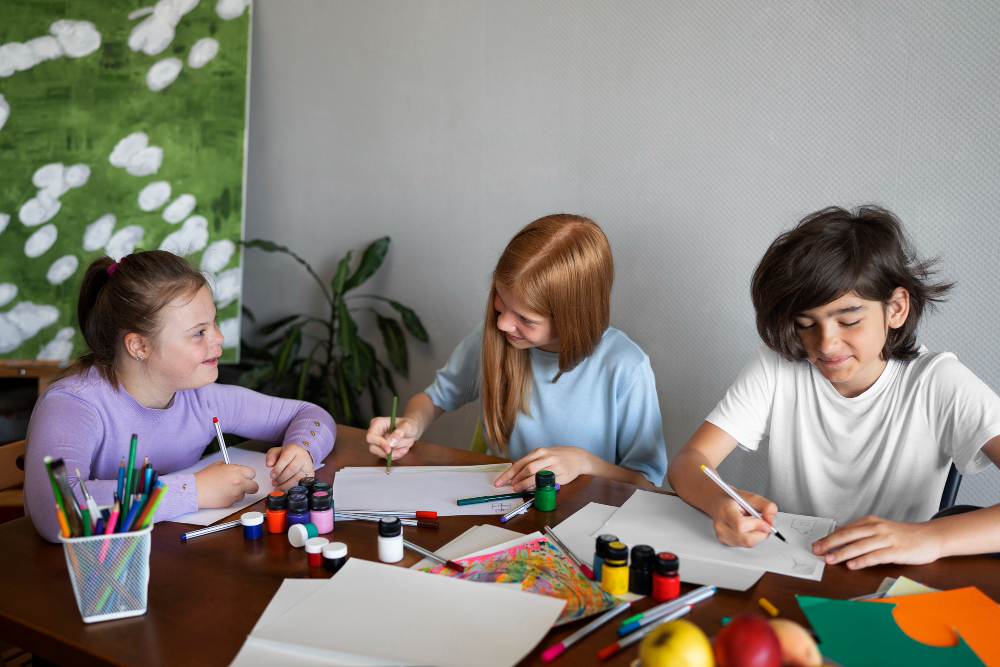
Parents or caregivers can involve their children in creating their own Cuddly Star gift by following these steps:
- 1. Gather materials: Provide children with materials such as fabric, stuffing, needles, thread, and any embellishments they may want to use, such as ribbons, buttons, or googly eyes.
- 2. Explain the process: Explain to the children what they are going to create and how they can do it. Encourage them to use their creativity and imagination to design their own Cuddly Star.
- 3. Assist with sewing: If the children are old enough, they can be taught basic sewing skills to sew the fabric pieces together. Younger children can use safety needles and get assistance from an adult.
- 4. Stuffing the star: Show the children how to stuff the fabric with the filling to give the star a soft and cuddly feel.
- 5. Decorating the star: Encourage the children to decorate their Cuddly Star with embellishments such as buttons, ribbons, and other materials.
- 6. Personalize the star: Children can personalize their Cuddly Star by adding their names, drawing on it, or adding any other personal touch they desire.
- 7. Discuss the educational aspects: While creating the Cuddly Star, parents or caregivers can discuss the shapes, colors, and textures of the materials being used, as well as the importance of patience and creativity in the process.
By involving children in creating their own Cuddly Star gift, parents and caregivers can provide a fun and educational activity that fosters creativity, fine motor skills, and a sense of accomplishment for the children.
The Cuddly Star can be personalized or customized for different children's preferences or interests in a few different ways:
- 1. Customizable features: The Cuddly Star can have customizable features such as different colored lights, sound effects, or touch-sensitive sensors that can be adjusted to suit the child’s preferences.
- 2. Customized appearance: The Cuddly Star can be made in different colors, patterns, or with different accessories such as ribbons or fabric designs to appeal to the child’s specific aesthetic tastes.
- 3. Personalized messages or names: The Cuddly Star can be programmed to say the child’s name, or include personalized messages or recorded voices that are special to the child.
- 4. Themed designs: The Cuddly Star can be created with specific themes in mind, such as animals, outer space, or favorite characters, to appeal to the child’s interests.
- 5. Interactive play options: The Cuddly Star can be programmed with interactive games, quizzes, or storytelling features that cater to the child’s interests and preferences.
FAQs for Cuddly Star:
Cuddly Star is a unique and adorable gift for young children. It is a soft and cuddly stuffed toy in the shape of a star, designed to bring comfort and joy to little ones.
Making your own Cuddly Star can be a fun and rewarding craft project. Here’s a step-by-step guide on how to make it:
- Step 1: Gather the materials – You will need fabric in the color of your choice, stuffing material, needle and thread, scissors, and any embellishments you want to add.
- Step 2: Cut out the star shape – Use a template or draw a star shape on your chosen fabric and cut two identical star shapes.
- Step 3: Sew the star – Place the two star shapes together with the right sides facing each other and sew around the edges, leaving a small opening for the stuffing.
- Step 4: Stuff the star – Turn the star inside out and carefully stuff it with the stuffing material. Make sure to fill it enough to give it a nice, plushy feel.
- Step 5: Finish sewing – Once the star is stuffed, sew the opening closed with a hidden stitch.
- Step 6: Add embellishments – If desired, you can add eyes, a smile, or any other decorations to personalize your Cuddly Star.
Absolutely! You can use any type of fabric you like to make your Cuddly Star. Soft and cozy fabrics such as fleece, minky, or cotton are great choices for creating a cuddly and huggable toy.
When made with proper sewing techniques and safety precautions, Cuddly Star can be a safe toy for young children. Make sure to securely sew all the seams and use non-toxic materials for stuffing and embellishments.
Yes, you can wash Cuddly Star. To keep it clean and hygienic, simply hand wash it with mild detergent and let it air dry.
Yes, you can personalize Cuddly Star by adding a child’s name using embroidery, fabric markers, or iron-on letters. This can make the toy even more special and meaningful as a gift for a younger kid.


